In the previous chapter, we created a sample RMI application. In this chapter, we will explain how to create an RMI application where a client invokes a method which displays a GUI window (JavaFX).
Defining the Remote Interface
Here, we are defining a remote interface named Hello with a method named animation() in it.
import java.rmi.Remote;
import java.rmi.RemoteException;

// Creating Remote interface for our application
public interface Hello extends Remote {
   void animation() throws RemoteException;
}
Developing the Implementation Class
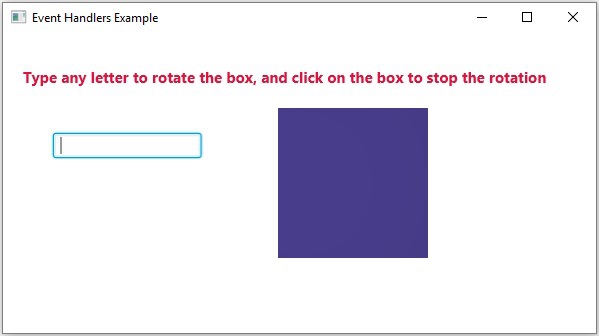
In the Implementation class (Remote Object) of this application, we are trying to create a window which displays GUI content, using JavaFX.
import javafx.animation.RotateTransition;
import javafx.application.Application;
import javafx.event.EventHandler;

import javafx.scene.Group;
import javafx.scene.PerspectiveCamera;
import javafx.scene.Scene;
import javafx.scene.control.TextField;
import javafx.scene.input.KeyEvent;
import javafx.scene.paint.Color;
import javafx.scene.paint.PhongMaterial;

import javafx.scene.shape.Box;
import javafx.scene.text.Font;
import javafx.scene.text.FontWeight;
import javafx.scene.text.Text;
import javafx.scene.transform.Rotate;

import javafx.stage.Stage;
import javafx.util.Duration;

// Implementing the remote interface
public class FxSample extends Application implements Hello {
   @Override
   public void start(Stage stage) {
      // Drawing a Box
      Box box = new Box();

      // Setting the properties of the Box
      box.setWidth(150.0);
      box.setHeight(150.0);
      box.setDepth(100.0);

      // Setting the position of the box
      box.setTranslateX(350);
      box.setTranslateY(150);
      box.setTranslateZ(50);

      // Setting the text
      Text text = new Text(
         "Type any letter to rotate the box, and click on the box to stop the rotation");

      // Setting the font of the text
      text.setFont(Font.font(null, FontWeight.BOLD, 15));

      // Setting the color of the text
      text.setFill(Color.CRIMSON);

      // Setting the position of the text
      text.setX(20);
      text.setY(50);

      // Setting the material of the box
      PhongMaterial material = new PhongMaterial();
      material.setDiffuseColor(Color.DARKSLATEBLUE);

      // Setting the diffuse color material to box
      box.setMaterial(material);

      // Setting the rotation animation to the box
      RotateTransition rotateTransition = new RotateTransition();

      // Setting the duration for the transition
      rotateTransition.setDuration(Duration.millis(1000));

      // Setting the node for the transition
      rotateTransition.setNode(box);

      // Setting the axis of the rotation
      rotateTransition.setAxis(Rotate.Y_AXIS);

      // Setting the angle of the rotation
      rotateTransition.setByAngle(360);

      // Setting the cycle count for the transition
      rotateTransition.setCycleCount(50);

      // Setting auto reverse value to false
      rotateTransition.setAutoReverse(false);

      // Creating a text filed
      TextField textField = new TextField();

      // Setting the position of the text field
      textField.setLayoutX(50);
      textField.setLayoutY(100);

      // Handling the key typed event
      EventHandler<KeyEvent> eventHandlerTextField = new EventHandler<KeyEvent>() {
         @Override
         public void handle(KeyEvent event) {
            // Playing the animation
            rotateTransition.play();
         }
      };

      // Adding an event handler to the text feld
      textField.addEventHandler(KeyEvent.KEY_TYPED, eventHandlerTextField);

      // Handling the mouse clicked event(on box)
      EventHandler<javafx.scene.input.MouseEvent> eventHandlerBox =
         new EventHandler<javafx.scene.input.MouseEvent>() {
         @Override
         public void handle(javafx.scene.input.MouseEvent e) {
            rotateTransition.stop();
         }
      };

      // Adding the event handler to the box
      box.addEventHandler(javafx.scene.input.MouseEvent.MOUSE_CLICKED, eventHandlerBox);

      // Creating a Group object
      Group root = new Group(box, textField, text);

      // Creating a scene object
      Scene scene = new Scene(root, 600, 300);

      // Setting camera
      PerspectiveCamera camera = new PerspectiveCamera(false);
      camera.setTranslateX(0);
      camera.setTranslateY(0);
      camera.setTranslateZ(0);
      scene.setCamera(camera);

      // Setting title to the Stage
      stage.setTitle("Event Handlers Example");

      // Adding scene to the stage
      stage.setScene(scene);

      // Displaying the contents of the stage
      stage.show();
   }

   // Implementing the interface method
   public void animation() {
      launch();
   }
}
Learn Java in-depth with real-world projects through our Java certification course. Enroll and become a certified expert to boost your career.
Server Program
An RMI server program should implement the remote interface or extend the implementation class. Here, we should create a remote object and bind it to the RMIregistry.
Following is the server program of this application. Here, we will extend the above created class, create a remote object, and registered it to the RMI registry with the bind name hello.
import java.rmi.registry.Registry;
import java.rmi.registry.LocateRegistry;
import java.rmi.RemoteException;
import java.rmi.server.UnicastRemoteObject;

public class Server extends FxSample {
   public Server() {}
   public static void main(String args[]) {
      try {
         // Instantiating the implementation class
         FxSample obj = new FxSample();

         // Exporting the object of implementation class
         // (here we are exporting the remote object to the stub)
         Hello stub = (Hello) UnicastRemoteObject.exportObject(obj, 0);

         // Binding the remote object (stub) in the registry
         Registry registry = LocateRegistry.getRegistry();

         registry.bind("Hello", stub);
         System.err.println("Server ready");
      } catch (Exception e) {
         System.err.println("Server exception: " + e.toString());
         e.printStackTrace();
      }
   }
}
Client Program
Following is the client program of this application. Here, we are fetching the remote object and invoking its method named animation().
import java.rmi.registry.LocateRegistry;
import java.rmi.registry.Registry;

public class Client {
   private Client() {}
   public static void main(String[] args) {
      try {
         // Getting the registry
         Registry registry = LocateRegistry.getRegistry(null);

         // Looking up the registry for the remote object
         Hello stub = (Hello) registry.lookup("Hello");

         // Calling the remote method using the obtained object
         stub.animation();

         System.out.println("Remote method invoked");
      } catch (Exception e) {
         System.err.println("Client exception: " + e.toString());
         e.printStackTrace();
      }
   }
}
Steps to Run the Example
Following are the steps to run our RMI Example.
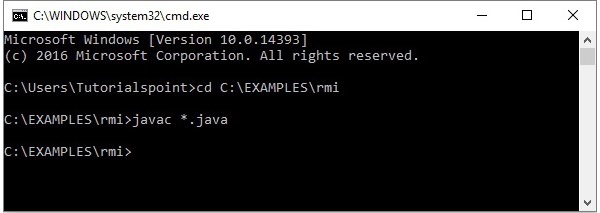
Step 1 − Open the folder where you have stored all the programs and compile all the Java files as shown below.
Javac *.java
Step 2 − Start the rmi registry using the following command.
start rmiregistry
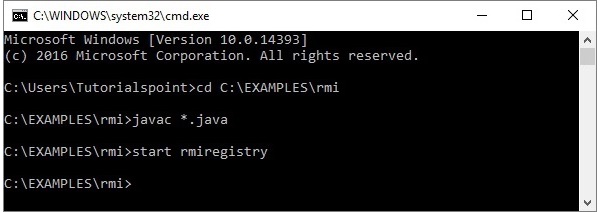
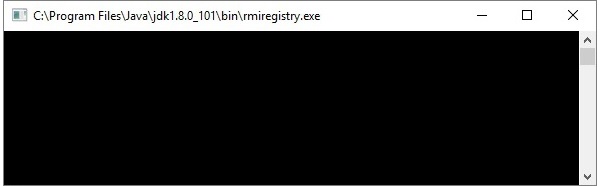
This will start an rmi registry on a separate window as shown below.
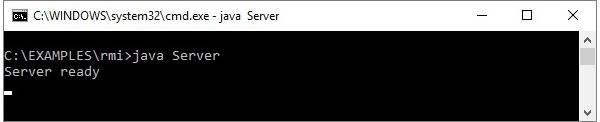
Step 3 − Run the server class file as shown below.
Java Server
Step 4 − Run the client class file as shown below.
java Client
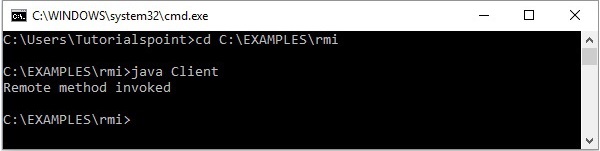
Verification − As soon you start the client, you would see the following output in the server.
Leave a Reply