In weighted average filter, we gave more weight to the center value, due to which the contribution of center becomes more than the rest of the values. Due to weighted average filtering, we can control the blurring of image.
We use OpenCV function filter2D to apply weighted average filter to images. It can be found under Imgproc package. Its syntax is given below −
filter2D(src, dst, depth , kernel, anchor, delta, BORDER_DEFAULT );
The function arguments are described below −
| Sr.No. | Argument & Description |
|---|---|
| 1 | srcIt is source image. |
| 2 | dstIt is destination image. |
| 3 | ddepthIt is the depth of dst. A negative value (such as -1) indicates that the depth is the same as the source. |
| 4 | kernelIt is the kernel to be scanned through the image. |
| 5 | anchorIt is the position of the anchor relative to its kernel. The location Point(-1, -1) indicates the center by default. |
| 6 | deltaIt is a value to be added to each pixel during the convolution. By default it is 0. |
| 7 | BORDER_DEFAULTWe let this value by default. |
Apart from the filter2D() method, there are other methods provide by the Imgproc class. They are described briefly −
| Sr.No. | Method & Description |
|---|---|
| 1 | cvtColor(Mat src, Mat dst, int code, int dstCn)It converts an image from one color space to another. |
| 2 | dilate(Mat src, Mat dst, Mat kernel)It dilates an image by using a specific structuring element. |
| 3 | equalizeHist(Mat src, Mat dst)It equalizes the histogram of a grayscale image. |
| 4 | filter2D(Mat src, Mat dst, int depth, Mat kernel, Point anchor, double delta)It convolves an image with the kernel. |
| 5 | GaussianBlur(Mat src, Mat dst, Size ksize, double sigmaX)It blurs an image using a Gaussian filter. |
| 6 | integral(Mat src, Mat sum)It calculates the integral of an image. |
Example
The following example demonstrates the use of Imgproc class to apply weighted average filter to an image of Graycale.
import org.opencv.core.Core;
import org.opencv.core.CvType;
import org.opencv.core.Mat;

import org.opencv.highgui.Highgui;
import org.opencv.imgproc.Imgproc;

public class convolution {
   public static void main( String[] args ) {

      try {
         int kernelSize = 9;
         System.loadLibrary( Core.NATIVE_LIBRARY_NAME );

         Mat source = Highgui.imread("grayscale.jpg",  Highgui.CV_LOAD_IMAGE_GRAYSCALE);
         Mat destination = new Mat(source.rows(),source.cols(),source.type());

         Mat kernel = Mat.ones(kernelSize,kernelSize, CvType.CV_32F) {

         for(int i=0; i<kernel.rows(); i++) {
            for(int j=0; j<kernel.cols(); j++) {

               double[] m = kernel.get(i, j);

               for(int k =0; k<m.length; k++) {

                  if(i==1 && j==1) {
                     m[k] = 10/18;
                  }
                  else{
                     m[k] = m[k]/(18);
                  }
               }
               kernel.put(i,j, m);

               }
            }
         };

         Imgproc.filter2D(source, destination, -1, kernel);
         Highgui.imwrite("output.jpg", destination);

      } catch (Exception e) {
         System.out.println("Error: " + e.getMessage());
      }
   }
}
Output
When you execute the given code, the following output is seen −
Original Image
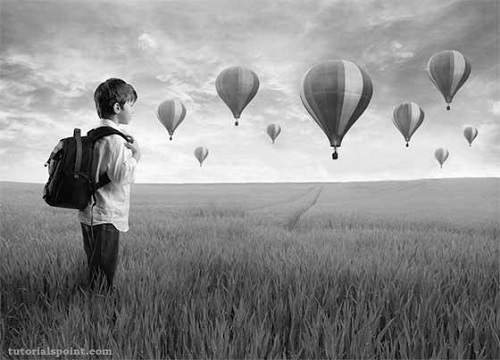
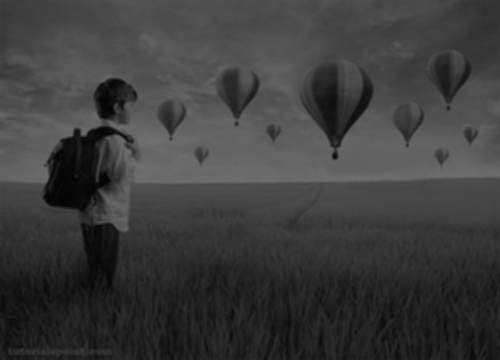
This original image is convolved with the weighted average filter as given below −
Weighted Average Filter
| 1 | 1 | 1 |
| 1 | 10 | 1 |
| 1 | 1 | 1 |
Convolved Image
Leave a Reply